

What is Teachable Machine ?
It is a web - based tool that makes creating machine learning models easier and quicker.
Recently, I attended my first hackathon, where I got familiar with Teachable Machine. Our team won "Best Advanced Hack", "Best Hardware Hack" and "Best Hack in Physical health category". Creating machine learning models using Teachable Machine is easier during hackathons.
So, let's get started !
Click here to go to Teachable Machine
Click on Get Started .
You will see the following page👇
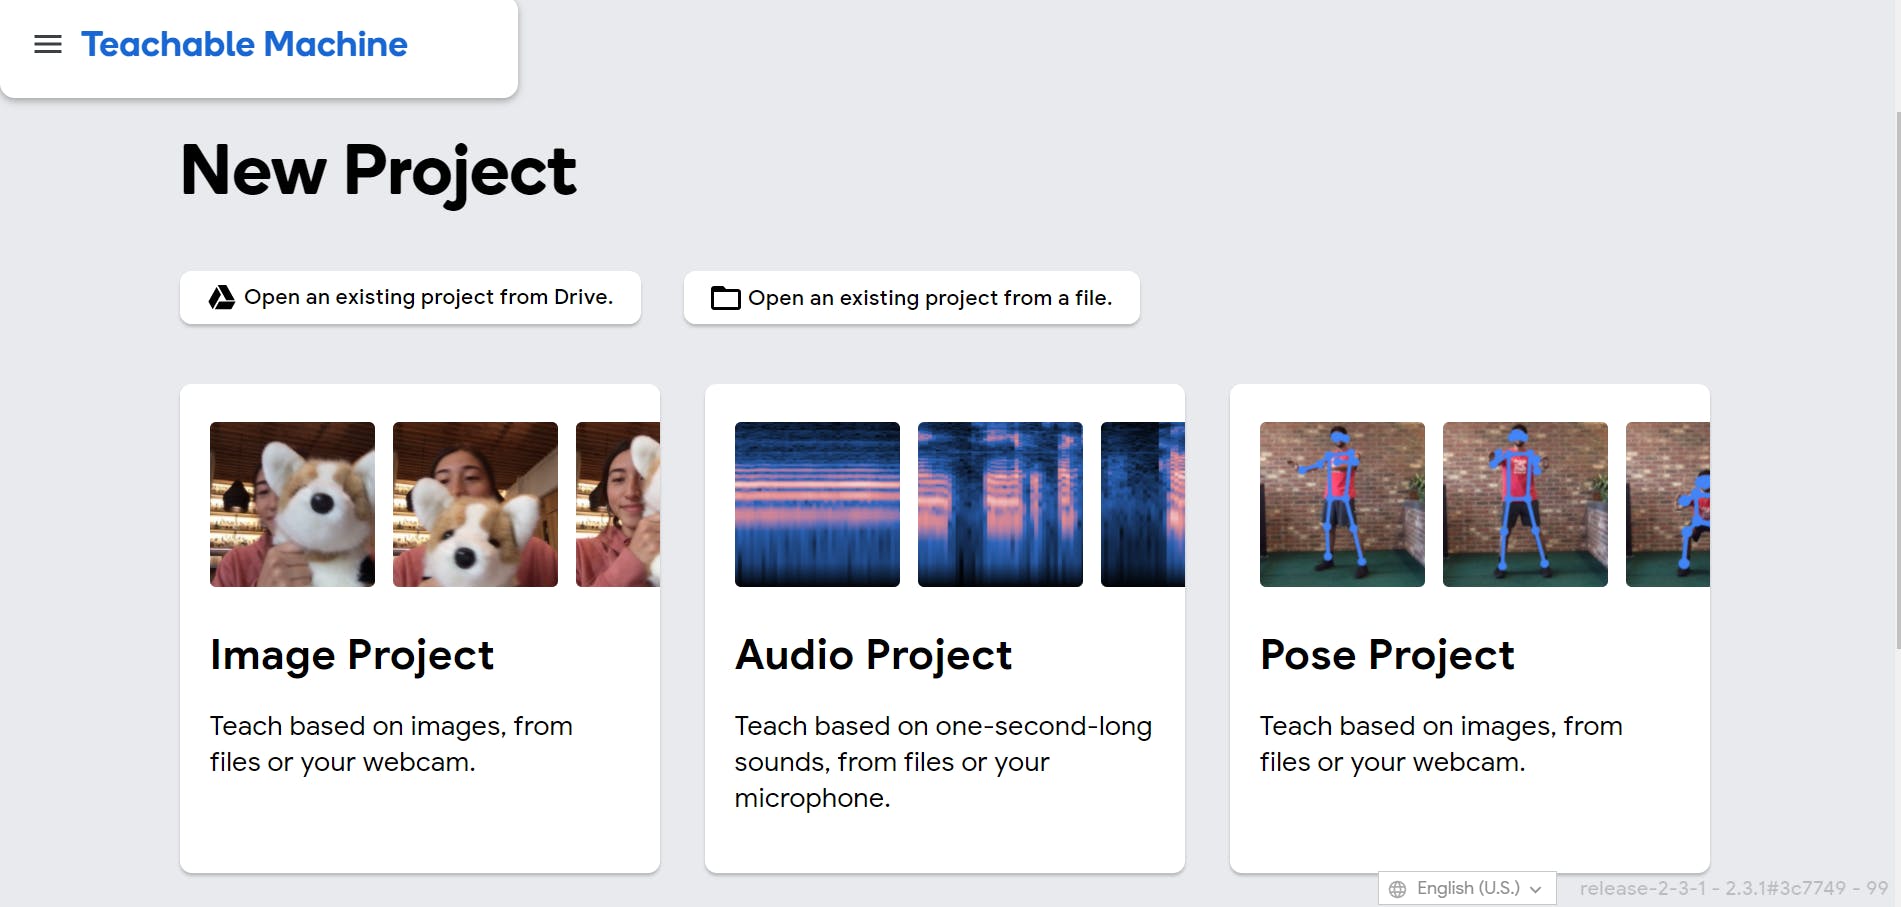
Since, we are making a Posture Analyzer , we will click on the Pose Project .
Classes are the different categories which we want our model to recognize.
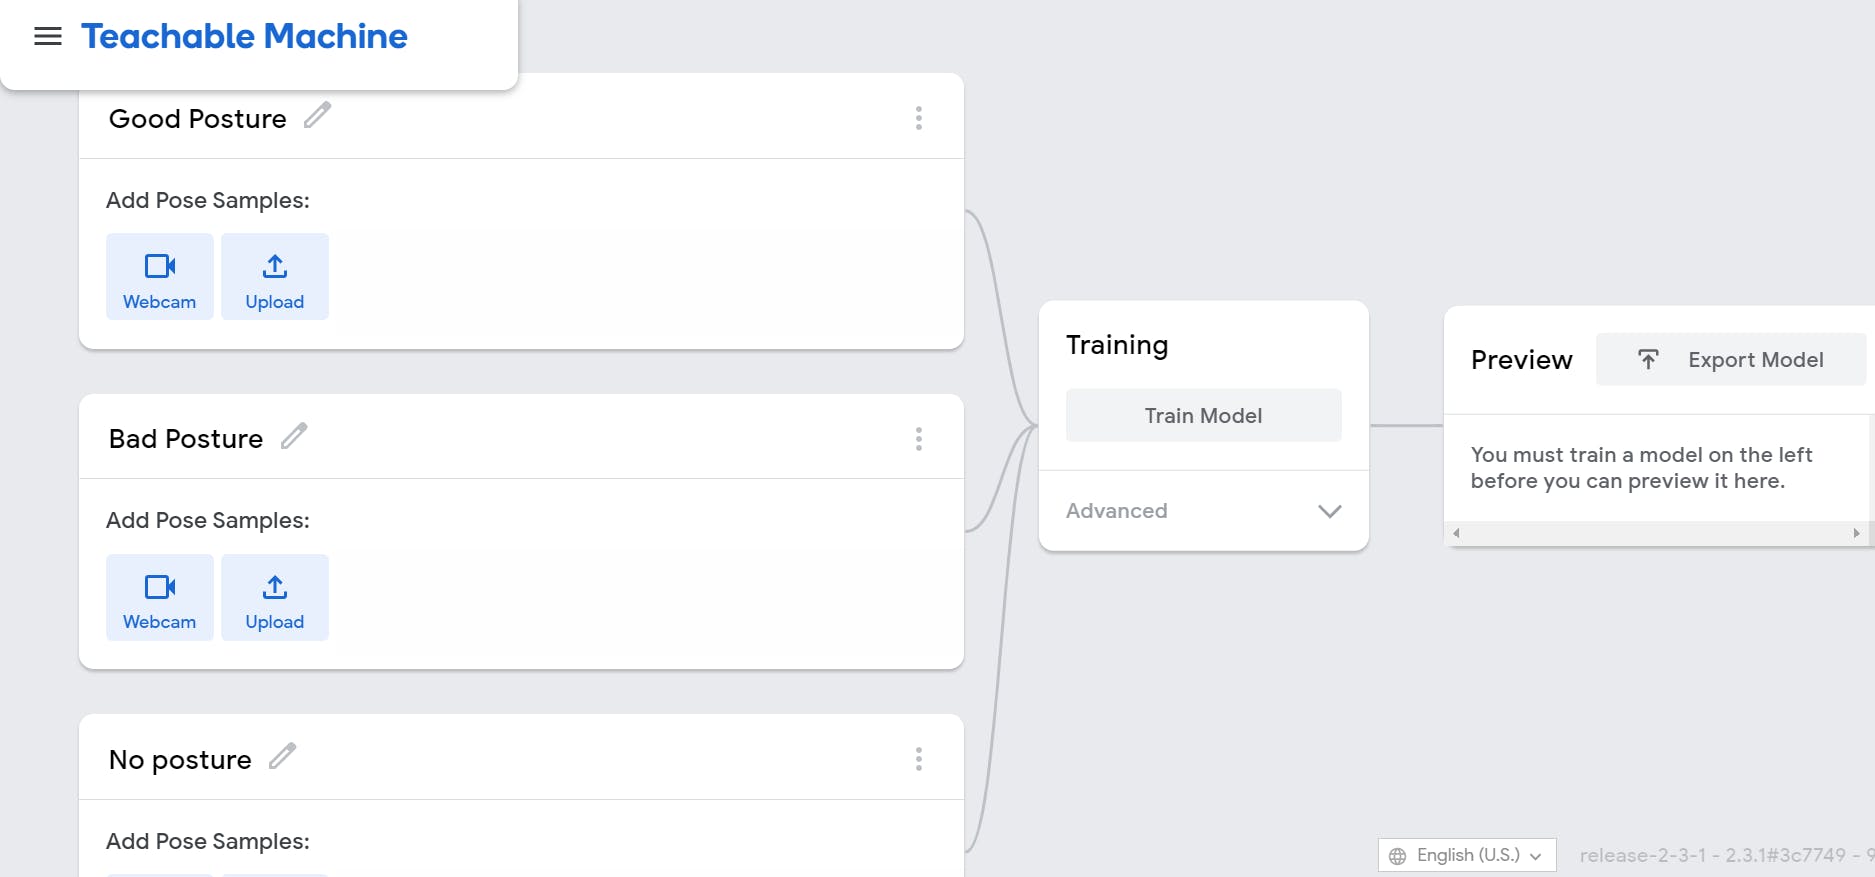
We will have three types of Classes :
- Good Posture means that we will be sitting up straight and our shoulders and ears will be aligned.
- Bad Posture needs no explanation 😆. Any kind of heads tilting, slouching shoulders and bending will be considered as bad .
- No posture will take care of the fact when no one is in front of the camera.
After renaming the classes the site will look like this.
Now we need to collect the dataset so as to train our model.
We will be using our webcam for this purpose.
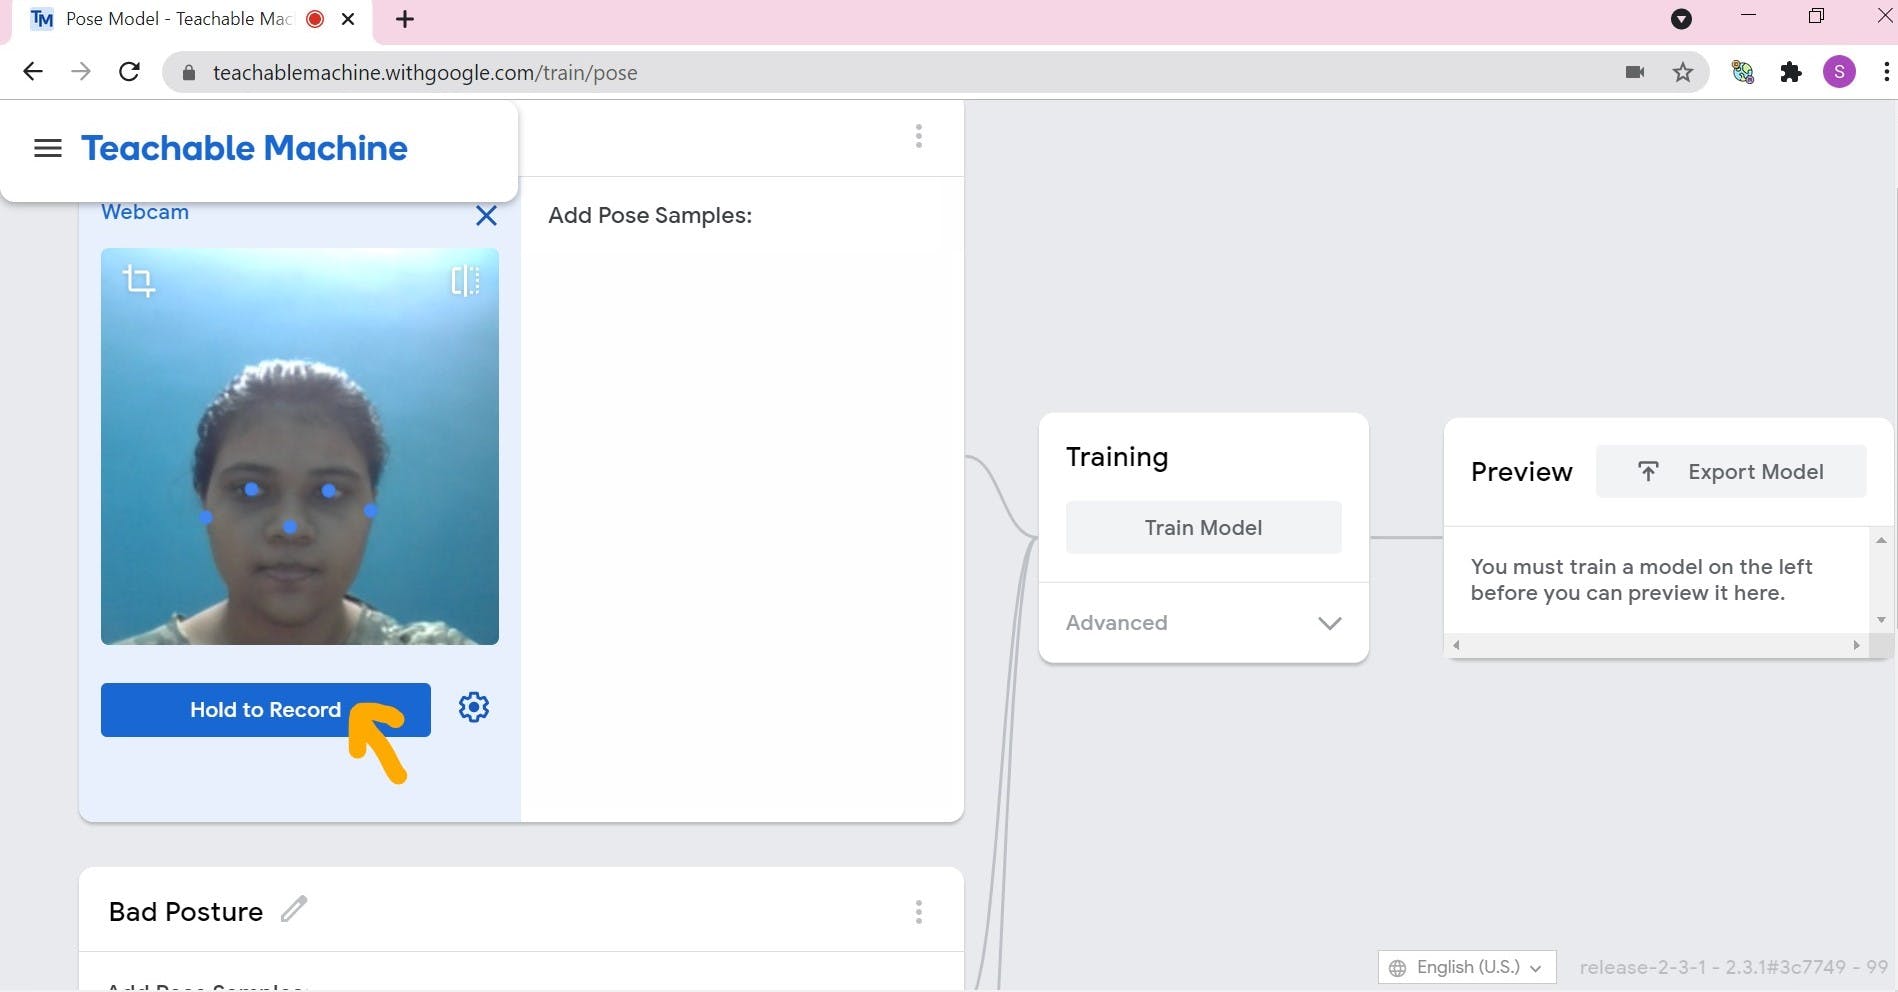
Position yourself straight for Good Posture , tilt your head and slouch for Bad Posture and leave your desk for No posture .
Collect about 40-50 for each class, add variety to your dataset . Take some time to choose the best images possible.
After collecting the images , we click on Train Model . Don't switch tabs during the training of the model.
After your model is trained , you can test it. It should work as below👇
Next, click on Export Model , you will see a JavaScript code snippet . To be able to add this to our project we need to upload our model to Google Cloud , which will then produce a shareable link.
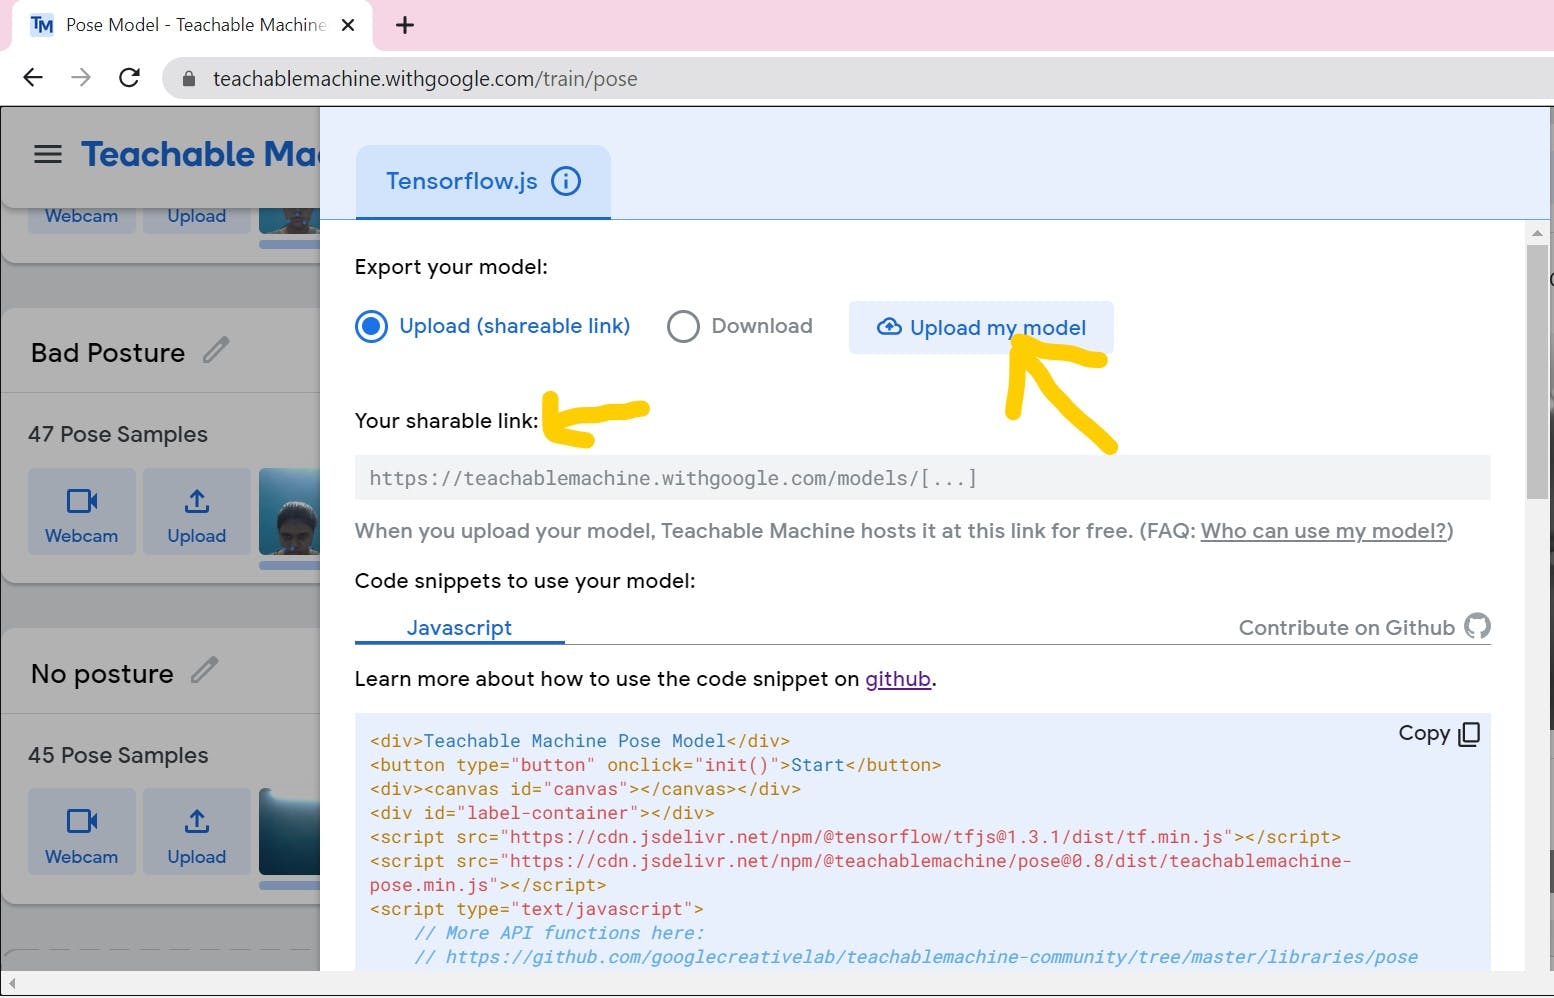
When you get the message "Your cloud model is upto date" , you can copy the code snippet and paste it into a index.html file in your preferred IDE.
<div>Teachable Machine Pose Model</div>
<button type="button" onclick="init()">Start</button>
<div><canvas id="canvas"></canvas></div>
<div id="label-container"></div>
<script src="https://cdn.jsdelivr.net/npm/@tensorflow/tfjs@1.3.1/dist/tf.min.js"></script>
<script src="https://cdn.jsdelivr.net/npm/@teachablemachine/pose@0.8/dist/teachablemachine-pose.min.js"></script>
<script type="text/javascript">
    // More API functions here:
    // https://github.com/googlecreativelab/teachablemachine-community/tree/master/libraries/pose

    // the link to your model provided by Teachable Machine export panel
    const URL = "https://teachablemachine.withgoogle.com/models/yezqdkZDq/";
    let model, webcam, ctx, labelContainer, maxPredictions;

    async function init() {
        const modelURL = URL + "model.json";
        const metadataURL = URL + "metadata.json";

        // load the model and metadata
        // Refer to tmImage.loadFromFiles() in the API to support files from a file picker
        // Note: the pose library adds a tmPose object to your window (window.tmPose)
        model = await tmPose.load(modelURL, metadataURL);
        maxPredictions = model.getTotalClasses();

        // Convenience function to setup a webcam
        const size = 200;
        const flip = true; // whether to flip the webcam
        webcam = new tmPose.Webcam(size, size, flip); // width, height, flip
        await webcam.setup(); // request access to the webcam
        await webcam.play();
        window.requestAnimationFrame(loop);

        // append/get elements to the DOM
        const canvas = document.getElementById("canvas");
        canvas.width = size; canvas.height = size;
        ctx = canvas.getContext("2d");
        labelContainer = document.getElementById("label-container");
        for (let i = 0; i < maxPredictions; i++) { // and class labels
            labelContainer.appendChild(document.createElement("div"));
        }
    }

    async function loop(timestamp) {
        webcam.update(); // update the webcam frame
        await predict();
        window.requestAnimationFrame(loop);
    }

    async function predict() {
        // Prediction #1: run input through posenet
        // estimatePose can take in an image, video or canvas html element
        const { pose, posenetOutput } = await model.estimatePose(webcam.canvas);
        // Prediction 2: run input through teachable machine classification model
        const prediction = await model.predict(posenetOutput);

        for (let i = 0; i < maxPredictions; i++) {
            const classPrediction =
                prediction[i].className + ": " + prediction[i].probability.toFixed(2);
            labelContainer.childNodes[i].innerHTML = classPrediction;
        }

        // finally draw the poses
        drawPose(pose);
    }

    function drawPose(pose) {
        if (webcam.canvas) {
            ctx.drawImage(webcam.canvas, 0, 0);
            // draw the keypoints and skeleton
            if (pose) {
                const minPartConfidence = 0.5;
                tmPose.drawKeypoints(pose.keypoints, minPartConfidence, ctx);
                tmPose.drawSkeleton(pose.keypoints, minPartConfidence, ctx);
            }
        }
    }
</script>
Change const URL = "The shareable link for your model" .
If you visit the shareable link, you will come to a page containing your model and additional information on how to use it in your project. You could explore and see the documentation on the different methods to use teachable machine models in your projects.
When you open your index.html in the browser, it should look like this 👇
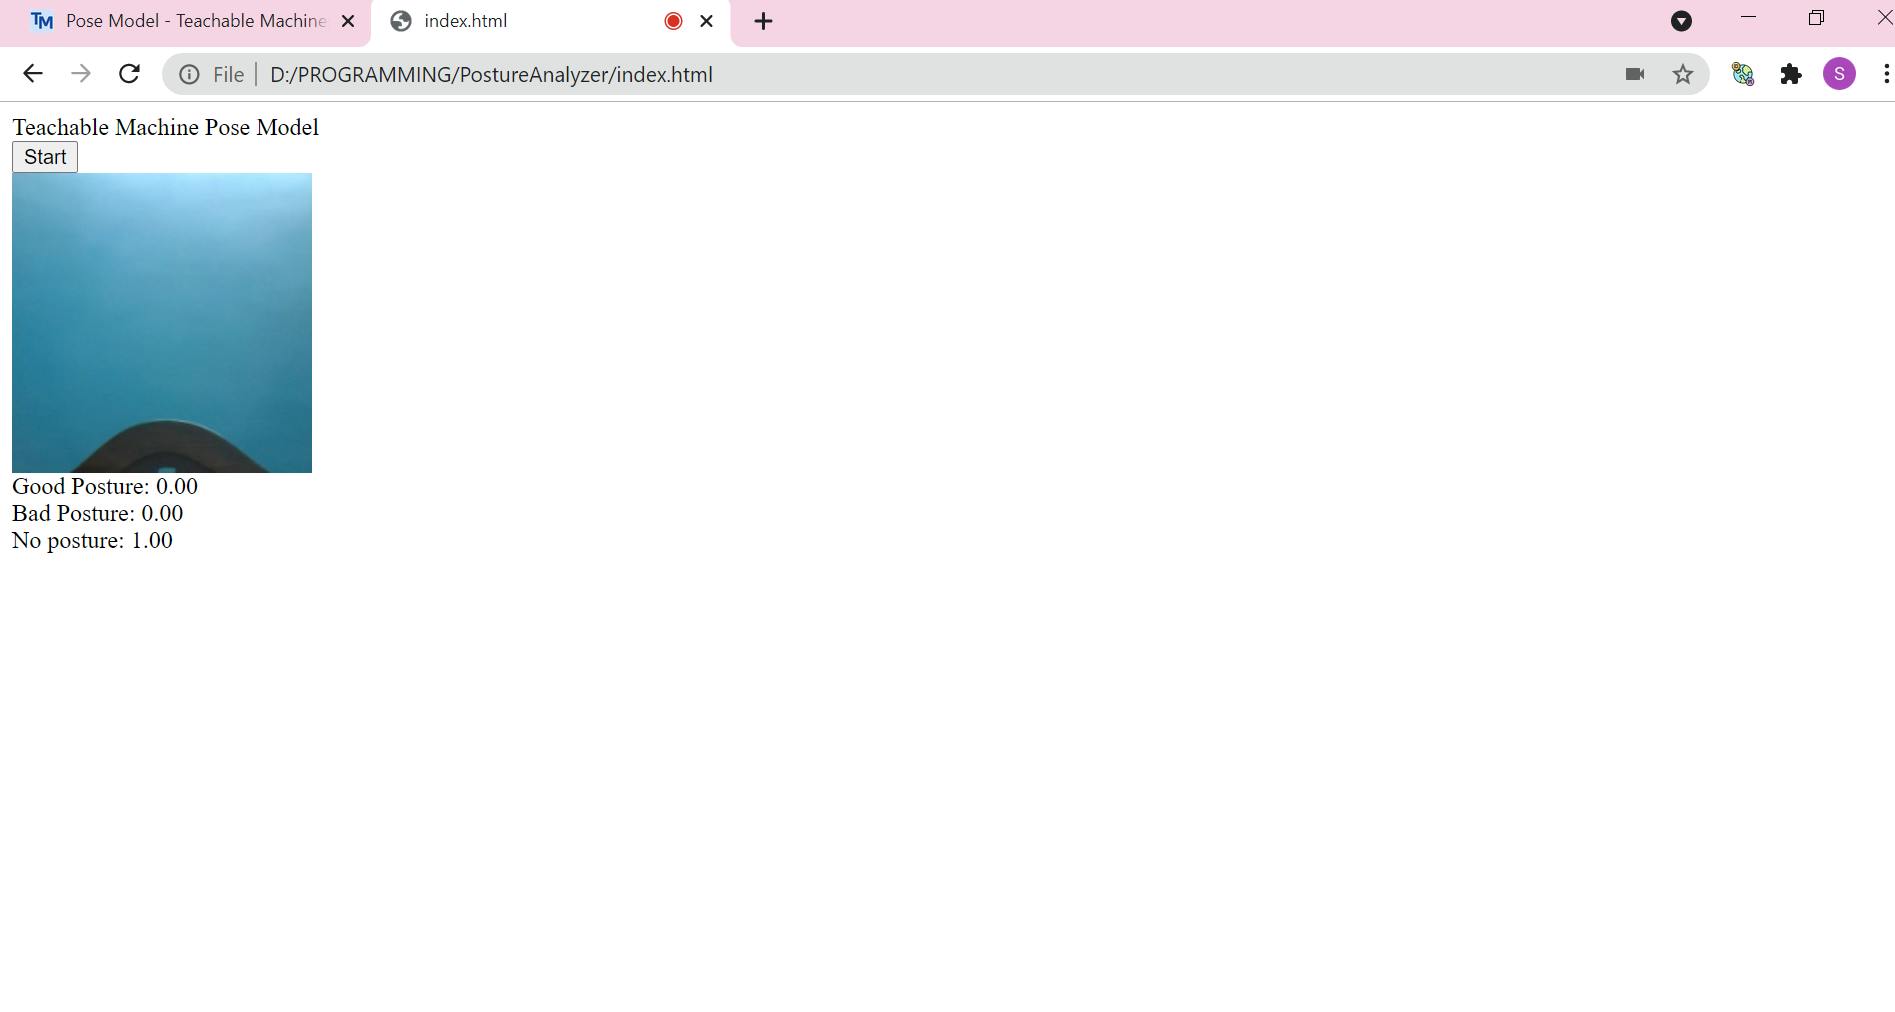
Now you can add CSS to your page and add more features to your project.
Dig-deeper into how else to use your model here .
GitHub link for the project we submitted for our hackathon 👉 Click Here!
Once you are familiar with Teachable Machine, you can create your own projects, related to images, or even sound ! Maybe a project that recognizes different instruments! 🎸🎻🎹
Thank you for reading my blog.
Happy learning!